Open the file created in Tutorial 1 with the File → Open menu command (shortcut key Ctrl+O) or the tool.
Open the constraint panel by using the Tools → Open Constraint Panel or with the tool.
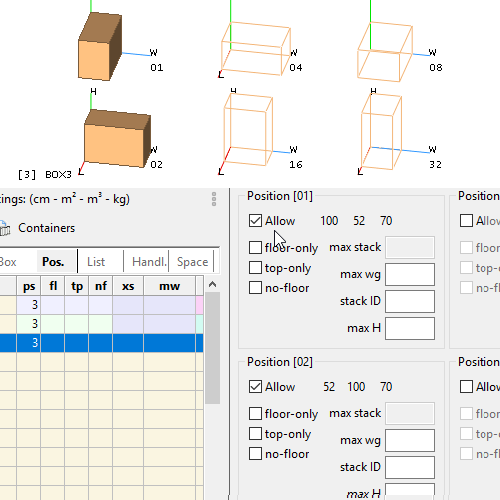
Select a grid row by clicking on it. The selected line is colored in blue.
Change the allowed positions by clicking on the Allow check boxes. Not-allowed positions are shown with wireframes.
Edit other rows as you like by clicking the mouse on the grid.
Repeat the optimization as seen in Tutorial 1 and see how the change affects the solution.
The six positions are numbered 1, 2, 4, 8, 16, 32. Position 1 is the one where the length, width, and height sides of the package are aligned to the length, width, and height of the container.
The constraint is encoded with a number given by the sum of the allowed positions and is shown in the ps column of the grid. Cells are editable as a shortcut option.
If a face is square, one of the two equivalent positions is disabled and shown in transparency. A cube therefore has only one enabled position.
The rules “floor only”fl, “top-only”ns and “not at floor”nf are encoded the same way.
The context menu (right-click on the grid to open) allows you to enforce common rules for selected rows.

 tool.
tool. tool.
tool.